Dygma Raise- World's most advanced gaming keyboard
Created by Luis Sevilla
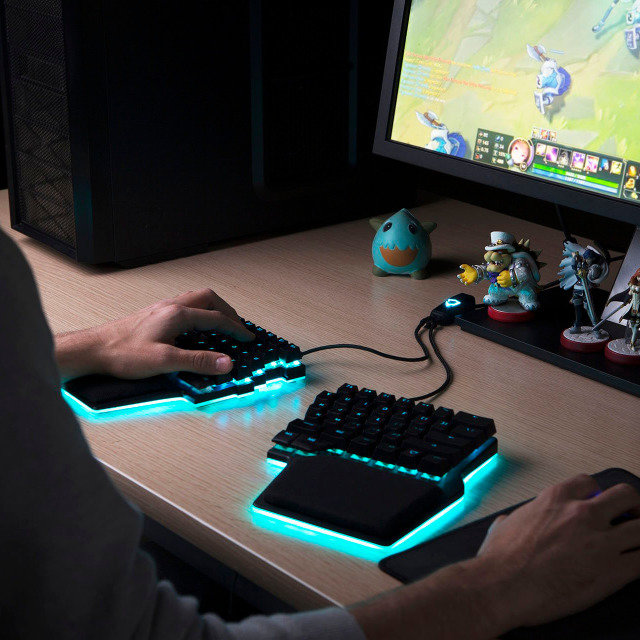
Dygma Raise is an ergonomic keyboard designed to increase gamers' performance, health and comfort.
Latest Updates from Our Project:
Mon Oct 1 '18 Announcement
over 7 years ago
– Mon, Oct 01, 2018 at 01:45:51 PM
Hey there backers!
Hope everyone had a great weekend!
Our Product Manager, Manel, and CTO, Matt, will be flying to Shenzhen tomorrow to meet with our manufacturing partners. We mentioned in our last update that this trip is a crucial time for the Raise development.
These are the things they wish to achieve during their trip:
Have all the tooling contracts finalised and signed
Check all the components to make sure everything fits
Create a planning schedule, or a Gantt chart, so we can have a precise estimation on the shipment of the Raise
While the guys are in China, they’ve left us with a few things that need your feedback:
The configurator software
The keycap artwork for some of the languages, specifically the Japanese and Nordic keycaps
MVP Raise Configurator Software
We know that many of you have been wanting to see the configurator, and the reason we haven’t shown anything is because we’ve been busy getting all the hardware ready for the Golden Prototype and the start of the assembly.
But now we have more time to work on the configurator.
What we have at hand is a mvp or a minimal viable product. The reason for doing that is because we want you to be part of the configurator development. We want your feedback to know what we can do to make it better.
We did have a functional configurator in the beginning, but it wasn’t user-friendly. With this mvp, we are aiming for it to be easy-to-use and visually receptive.
We will also contract an external UI expert, and with all of your feedback combined, we will apply that to make the configurator that ships with the Raise keyboard.
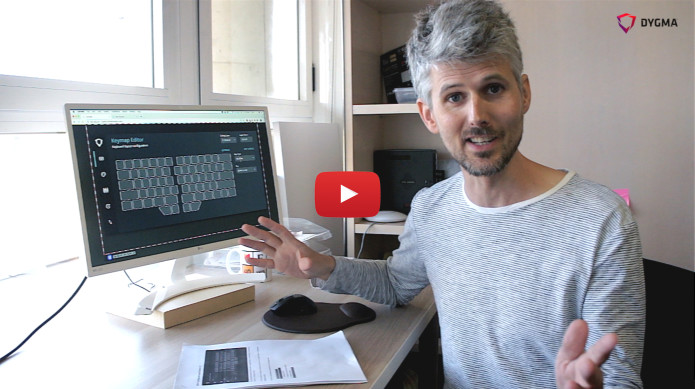
In the video below, Matt explains the layout of the wireframe. It is still basic and not functional. But this is because we want to get the right design for all functionalities first. In order to do that, we need to get your feedback!
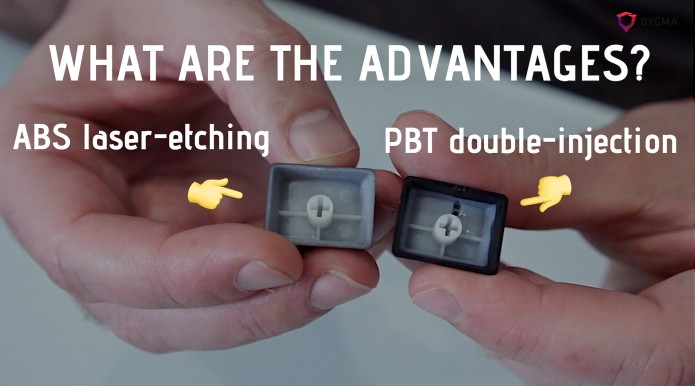
The ABS and PBT keycaps of the Raise
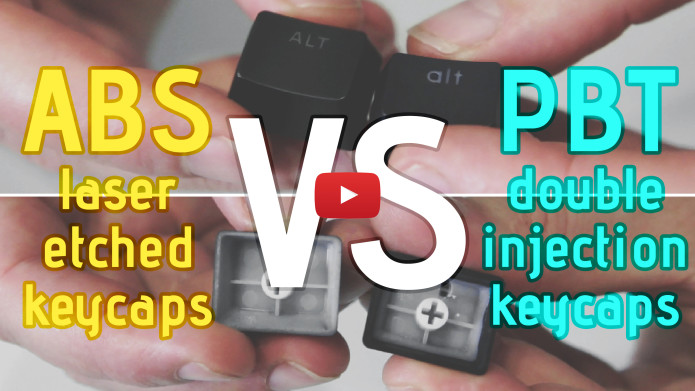
With the Raise keyboard, we offer two different kinds of keycaps: ABS laser-etched keycaps and PBT double-injection keycaps.
What are the differences?
In terms of their appearance, ABS keycaps are smoother and shinier, while PBT keycaps are not shiny and has a bit of texture.
How are they made?
ABS keycaps are made by a single-injection of translucent material, ABS (Acrylonitrile Butadiene Styrene) material. Then they are painted in black color or white color. After that, they are laser-etched with the legend.
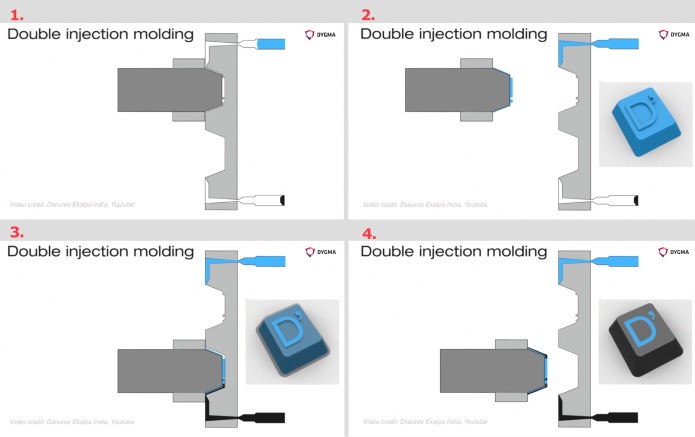
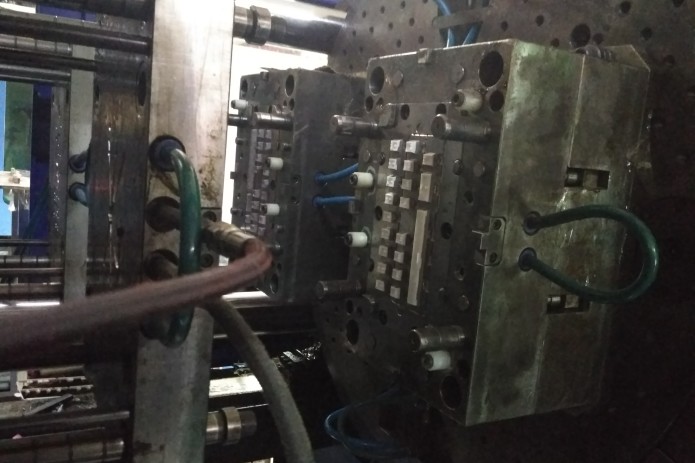
PBT keycaps are made by a double-injection process. In this process, there are two molds. One mold is injected with PBT (Polybutylene Terephthalate), which is the opaque part of the keycap. This piece is then moved to another mold and injected with a translucent material, which is a combination of ABS and polycarbonate (PC).
PBT double-injection process
What are the advantages of each one?
With ABS laser-etched keycaps, the backlight is more intense because of the translucent material. These keycaps are also cheaper to produce. This means it’s great for creating small batches of multiple languages without having to create a mold (which is very expensive). This is the most common keycap used in gaming keyboards so you can find them everywhere.
The PBT double-injection keycaps are of higher quality and are more long-lasting because it is made of two different materials. It does not wear easily. It has a ‘rough’ texture and some people prefer this.
What are the disadvantages?
After constant use, the paint in ABS keycaps begin to shine. They wear faster than PBT.
As for PBT keycaps, they are harder to produce because the materials and mold used to make them are extremely expensive. It’s hard to find languages, other than English, with this material.
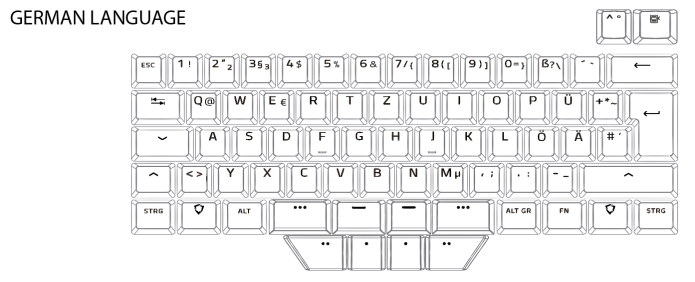
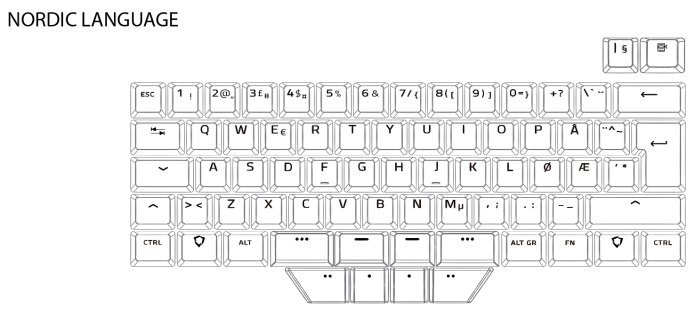
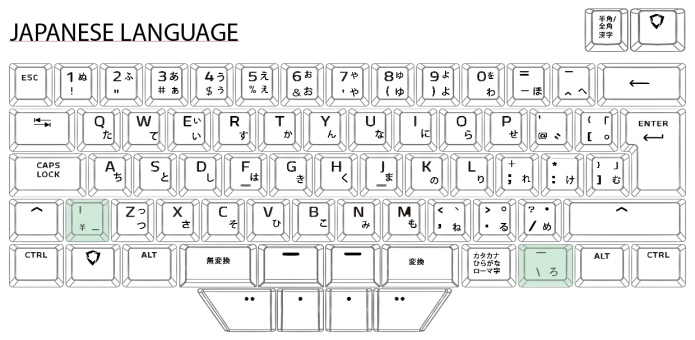
The artwork of each language
We offer 5 different languages in ABS laser-etched keycaps: Spanish, French, German, Japanese, and Nordic. For these keycaps, we chose the font, the size, and the design.
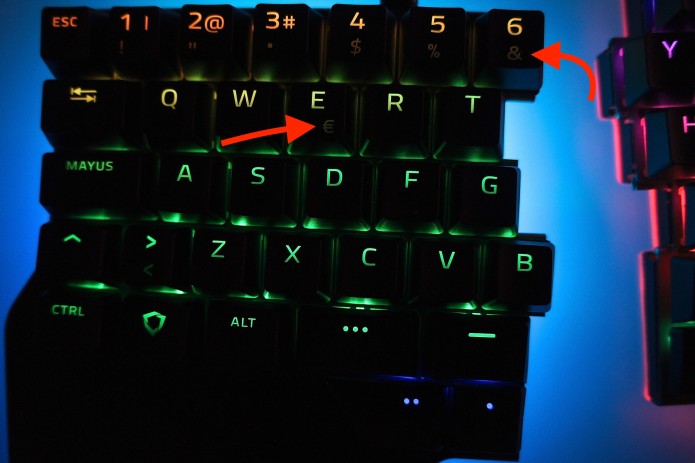
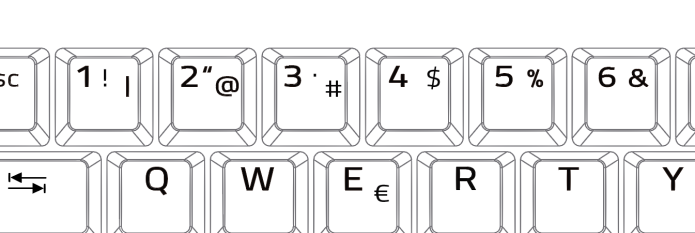
What we really wanted for our artwork is to have big letters so that light can become more evident. When we received the golden sample, we quickly realized that the symbols positioned at the lower part of the keycaps did not emit as much light. This is because our LEDs are located at the top of the switch.
We then reworked the artwork and placed all lower symbols to the first row of the keycap.
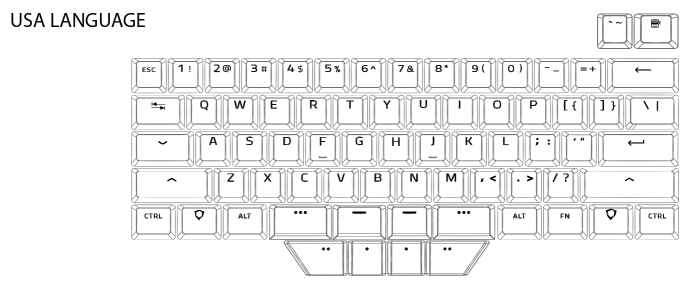
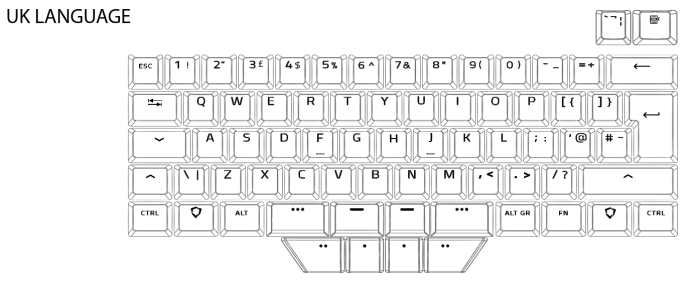
This is where we need your feedback. We had to adapt some of the keycap languages to the split design of the Raise and we would like your opinion on the artwork we’ve done, especially for the Nordic and Japanese keycaps.
Note: the 2 keys on the top right are extra keys.
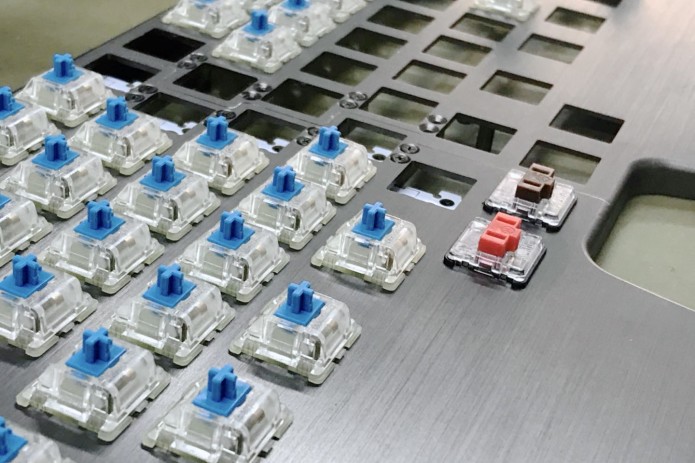
For the PBT keycaps, it was a different story. Since the mold for PBT keycaps is expensive, we just had to look for different double-injection PBT keycap suppliers and check their products. In our last trip to Shenzhen, we were able to see different samples and decided the one we liked best.
Our PBT keycaps are the US English and UK English keycaps, which are included with the Raise by default.
The special keycaps
Apart from the off-the-shelf keycaps, we have 8 special keycaps for the thumb, and also two special keycaps with the Dygma logo. These keycaps will be made with a 10-cavity mold. With this mold, we will be creating both PBT and ABS keycaps.
That’s all for the keycaps!
Your feedback needed
We hope that you find all this information interesting! Again, we would greatly appreciate your feedback on the configurator software and our artwork so you can leave us a message at the comments section!
Thank you again for all of your support. You all have played a big part in the Raise development!
Wed Sep 19 '18 Announcement
over 7 years ago
– Wed, Sep 19, 2018 at 04:43:41 AM
Hey guys,
After months of development, we're finally finished with the industrial design of the Raise keyboard. A great milestone for us! We're ready to move to the next step, the manufacturing. But before starting the manufacturing, we have to make the tooling.
What is tooling for manufacture?
The tooling is the different tools you need to make to build your product.
There are many different types of tooling, such as jigs and fixtures; cutting tools for milling and grinding machines; dies for cold forming sheet metal; inspection fixtures, etc.
For the Raise, the products that are made through plastic injection require an injection mold. The stamped aluminium pieces, -such as the top panel, the Huble cover, and the joint pieces-, require stamp dies. The palm pads require a jig, the PCBs need testing jigs, etc.
Different tooling equipment
Why is tooling important?
The quality of a finished product, its components, the speed and accuracy with which it can be produced and the repeatability of manufacturing in high volumes, all depend on the precision and characteristics of the tooling. These tooling pieces come at a high cost.
This means that our tooling needs to be designed and engineered to the highest quality which is why we created the Golden Prototype.
For the last few weeks we’ve been finalizing the Golden Prototype and carefully checking all design features with our suppliers. Even if it’s a difference of 0.1 or 0.05 mm, we still need to make the necessary modification to ensure that everything is precise for manufacturing. It has taken more time than expected but everything has to be top-notch.
What do we need to finalize before creating the tooling?
Base
We improved the structure of the base and made it sturdier. Our manufacturer already received the new 3D drawings and confirmed that the modifications can be manufactured.
Huble
One thing that we changed with the Huble, but is not affecting the tooling, is its colour. Now it’s black and looks even more beautiful.
Black aluminium cover of the Huble
The part of the Huble that is affecting the tooling is the thickness of the aluminium. In the Golden Prototype this metal part was too thin. As a result, there were a few visible dents which we talked about in our last update.
We had to change the aluminium to a thicker sheet. The manufacturers have already confirmed that this will fit better to the shape of the plastic part of the Huble. We also had to modify the plastic part by 0.4 mm but this is a minor modification that has already been validated.
Top Panel
We slightly modified the tolerances between the two top panel pieces by 0.2 and made all the edges a bit rounder to avoid forming scratches. We’ve also adapted the holes for the switches to make it easier to fit and detach.
Black aluminium top panel
The last improvement we did was to change the color to black. In the first Golden Prototype, the color of the top panel was light grey.
Metal Pins
We slightly modified the shape of the female pins. This was an aesthetic decision. Before it had a square shape. Now it’s round and looks more integrated with the keyboard. We also had to adapt the joint piece for this modification.
Round metal pins - female
Since all of these components are related to each other, it's a bit of a waiting game until everything is finalized. We can't start the tooling of one piece until all the other pieces are confirmed.
But the good news is that all of these modifications have already been confirmed and we have started making the tooling of the metal pins.
What are the components not related to the tooling?
Although there are a few things that can block the tooling, there are also pieces not related to the tooling. And after receiving the Golden Prototype we decided to improve certain components to meet our high-quality standards.
The laser-etched keycaps
The quality and design of the laser keycaps have been approved. But we realized we could improve the artwork.
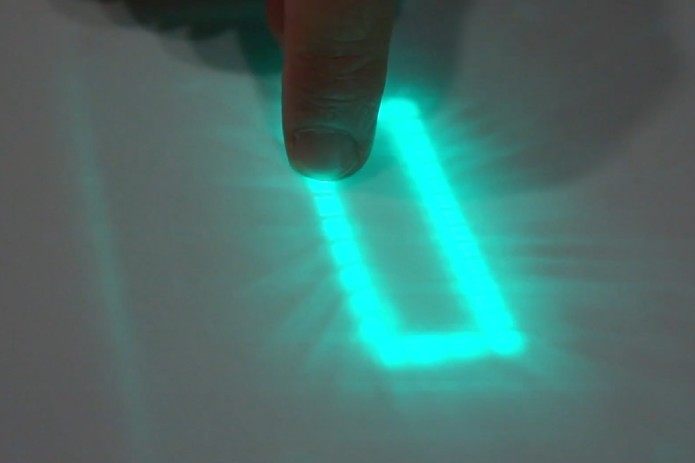
Because the reverse LEDs are positioned at the top of the switch, the artwork at the lower part of the keycap does not emit a bright light. This affects some keycap languages -Spanish, French, German, Nordic, and Japanese- that have more than 2 symbols in one keycap.
Minimal light passing through the lower symbol
Though this is standard, we'd still like to improve it. We are going to fit the 3rd symbol to the top row.
Modified keycap artwork
This is the illustration of the modified keycap artwork. We'll do a video about this next week.
Cables
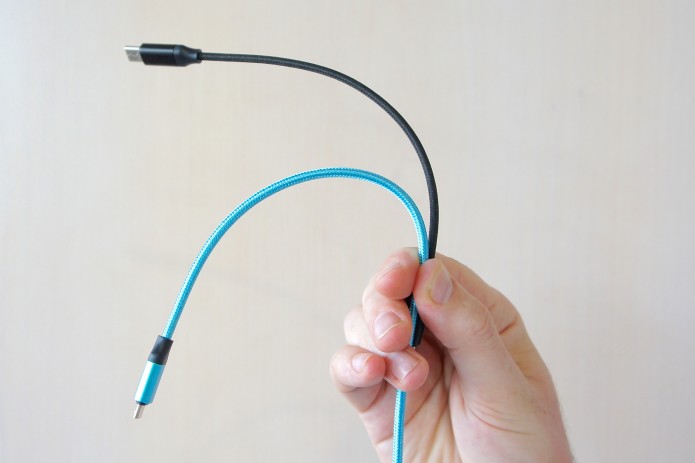
The last sample of cables were a bit thin and rigid so a minor adjustment we did was change the material inside to make it slightly thicker and more flexible.
Comparing flexibility of cables
The black cable is the last sample we received. The blue cable is the new cable that has the flexibility we want. The look, color, and finishing will still be the same (black for the black Raise and white for the silver Raise) but now you’ll just have an easier time moving your keyboard around without flipping the Huble.
Mylar
The Mylar is the plastic sheet found at the bottom of the Raise. It will have an aluminium color -same color as the keyboard- on the exterior part, and a white color on the interior part.
We are now working on the artwork for the Mylar. We will put the Dygma logo at the bottom in front of the LEDs so when the underglow changes color, you can see it shine through the artwork.
LEDs shining through the Mylar
Packaging
We have already finalized the packaging design of the Raise. Initially we had intended to have the switches and keycaps separate from the body and have the user assemble it.
But in the end, you'll receive your Raise pre-assembled. For those who ordered extra keycaps and switches, you'll have those in extra boxes but in the same package.
Conclusion & next steps
We are working non-stop finalizing the parts needed to start making the tooling. While the tooling is being made, we'll finalize the rest of the pieces.
Manel and Matt will be flying to Shenzhen in the first week of October to do the final checks in the factories and then sign the tooling agreements. They will also be able to create a proper planning schedule and will share them as soon as they come back.
By the second week of October, they will have a much more precise estimation on the delivery date. As you can imagine, this is a crucial time for the Raise development and we are all excited for this trip!
Some of the tooling will take only 2 weeks to create but there are some, like the tooling for the plastic injection pieces, that will take 35 days to create. So it’s still a bit of a wait.
When everything has been signed and the tooling has been done, we'll move to manufacturing.
As always, we will keep you all informed with everything we do. Thank you for all of your patience and we are all looking forward to begin manufacturing!
Wed Aug 29 '18 Announcement
over 7 years ago
– Wed, Aug 29, 2018 at 04:04:17 AM
Hey guys,
Here are the latest updates of the Golden Prototype!
Experiments with the joint
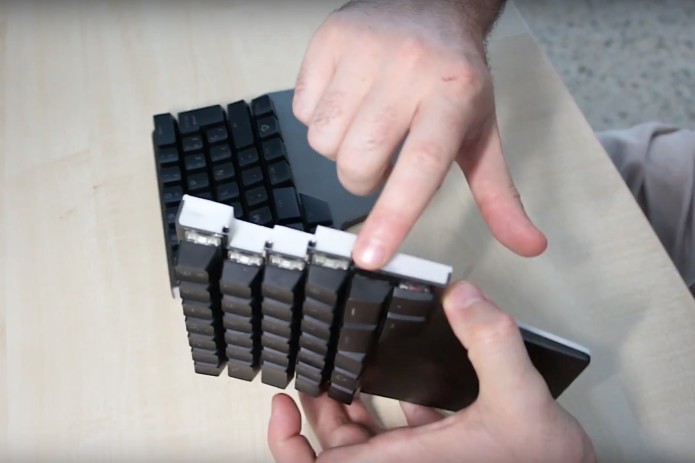
What’s unique about the Dygma Raise is that it’s a split keyboard that you can attach and detach. This means that when it’s attached, it needs to have the sturdiness of a whole keyboard.
We’ve been working on different iterations for the joint piece of the Raise. It evolved from having a plastic joint, to a metal joint, and to finally, metal pins! You can read more about it in our blog.
In the last weeks, we've been working hard finalizing the Golden Prototype. Missed our update about the Golden Prototype? Read all about it here.
We’ve been working on the different ways we can connect the metal pins for the joint of our Golden Prototype.
In our first experiment, we had all the male metal pins on one side, and all the female on the other. The attachment of the two halves felt strong and sturdy. It was easy to attach and detach, also because of the help of magnets. But we believed it could be done better.
All female connectors on one side
For our second experiment, we wanted to see the keyboard’s stability with only 2 pins. We found that it was still easy to attach and detach. But it didn’t feel as strong.
Using only 2 pins
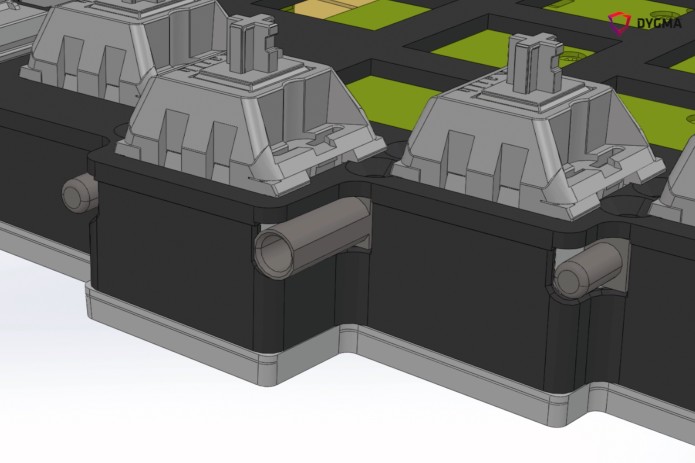
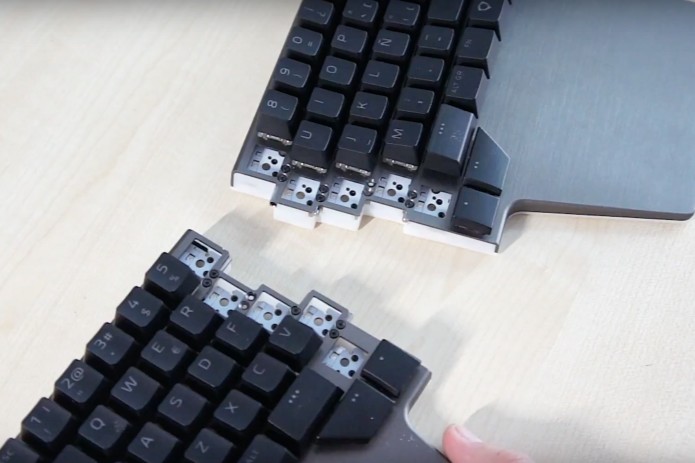
Finally, in our third experiment, we alternated the male and female pins. This way, the clearance is distributed between both sides of the keyboard. We tested it and found that it felt more solid than the first experiment. It was the best option!
Alternating male and female pins
We are going ahead with this version of having the alternated male and female metal pins for the joint of the Raise. We still need to do some tests and adjust the metal pins for mass production, but in general, we are confident with this solution. It works perfectly!
Testing the base for the underglow
In the validation of the base of the Golden Prototype, we are testing a lot of different things: the sturdiness of the base material, the dimensions and fitting with the aluminum case, the mylar sticker, the rubber legs, and many others.
But the most important thing that we need to validate is the light underglow.
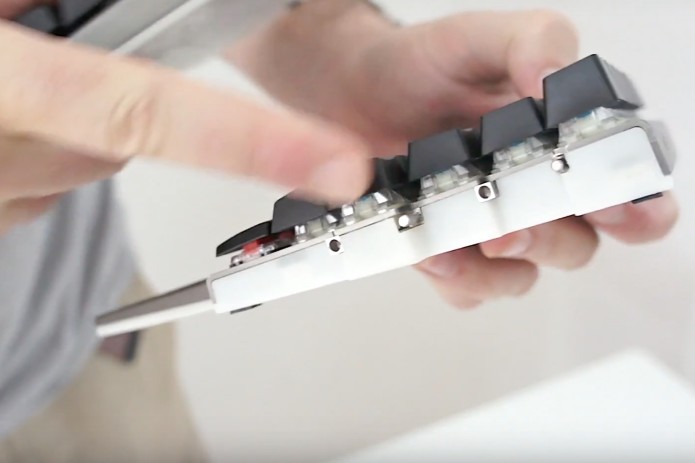
There are three main light sources in the keyboard: the light from the Huble, the backlight from the keycaps, and the underglow of the base.
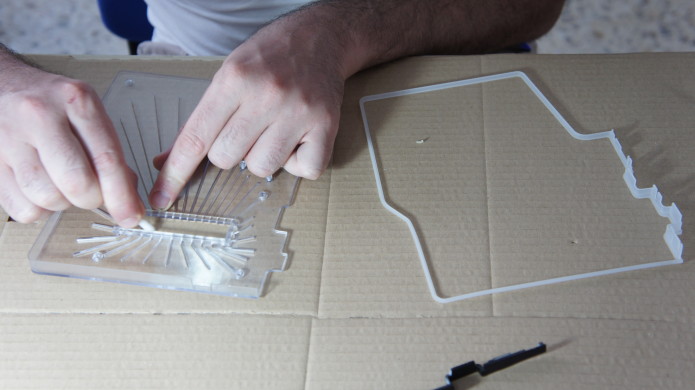
Light pipe and diffuser
The base has a light pipe that is a transparent piece of polycarbonate. The main function of this part is to distribute the light evenly from the PCB to the perimeter.
Another important part of the base is the diffuser. The diffuser is a plastic piece wrapping around the edges of the light pipe. The main task of this piece is to diffuse the light so you don't see any light spots from the LEDs.
Light pipe (left) and diffuser (right)
Gluing the diffuser to the light pipe using optical glue
These two pieces, the light pipe and the diffuser, are the main pieces of the base.
We made a Golden Prototype gluing both with optical glue. It was a difficult task but we needed to do this ourselves for this validation.
For the mass production of the Raise, it will be done differently in the factories.
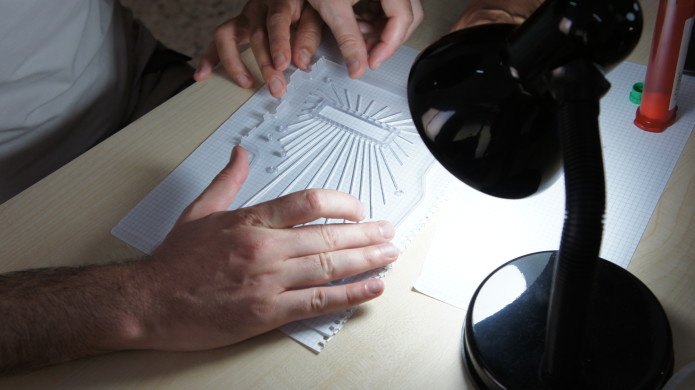
Hiring a light expert
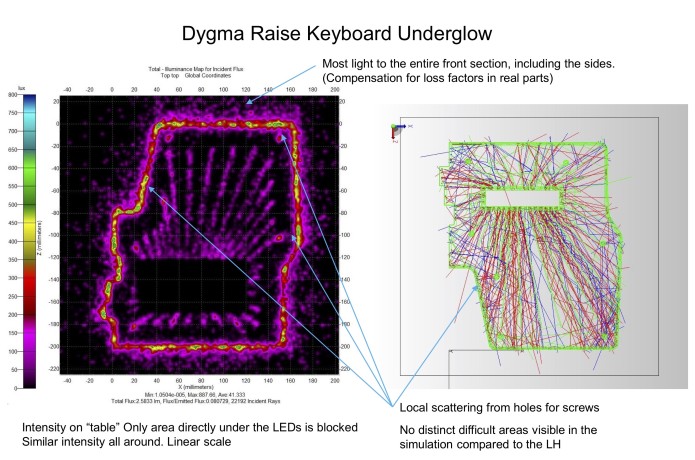
During the design process of this piece, we hired a consultant, an expert in lighting and light distribution. We did a 3D model of the base and a simulation of the light. Because of this simulation, we were able to achieve homogeneous light in all parts of the perimeter.
Light simulation tests
There were mainly two things we wanted to validate with the underglow of the base. It was the evenness and the intensity of the light. Both are very important.
All the simulations we’ve done are related to the evenness of the light. All the electronics, the choice of the LEDs and the LED driver, and the design of the PCB, are related with the intensity of the light. Consequently, the user can control the intensity of the light they want.
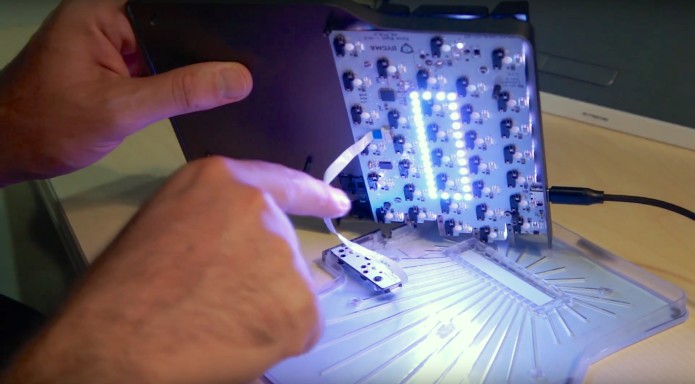
The white box concept
To increase the light intensity inside the keyboard, we created a white box.
The mylar sticker that we are sticking to cover the bottom of the base has a white color in the interior side and an aluminum/dark grey color in the exterior. The PCBs are also white. This means that we have two white surfaces surrounding the lights.
White PCB and white mylar
As a result, when the LEDs are turned on, the lights would bounce everywhere and get reflected to all the edges. This is a good solution for increasing intensity.
Validation success and next steps
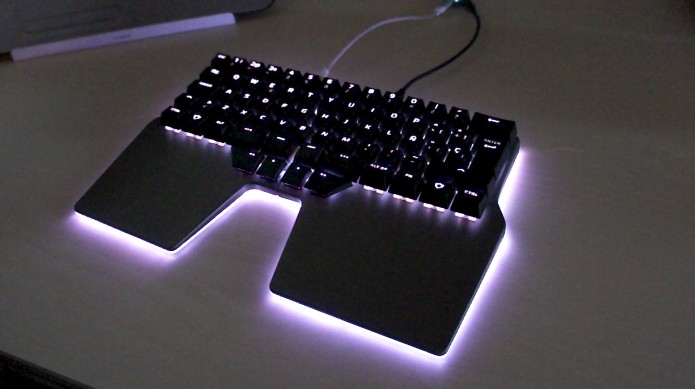
Validating the base underglow
We tested the base underglow and are happy with this design. We will go ahead with the molding of this piece.
The next steps will be to create the designs for the different light effects, color, etc, but the most important thing is that we have achieved the intensity and the evenness we want.
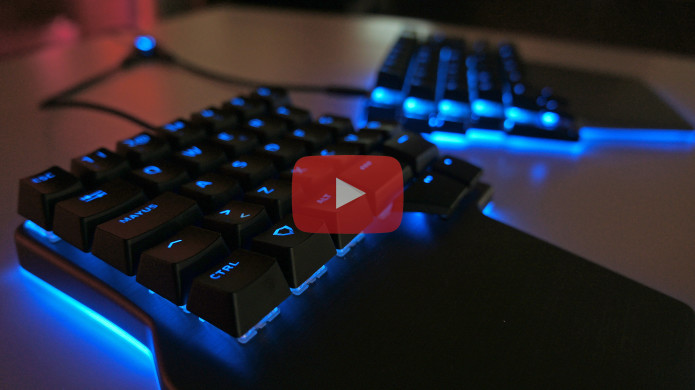
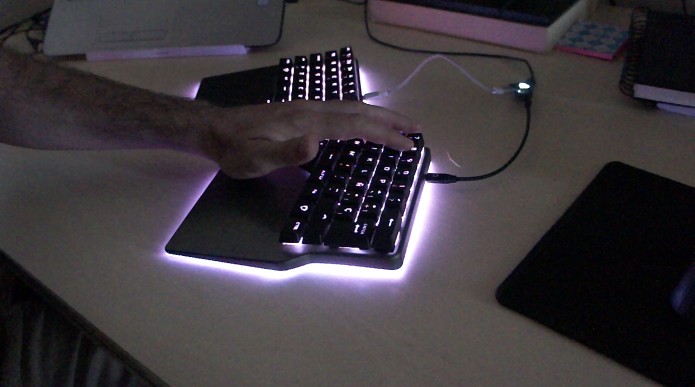
Underglow
Thanks for staying updated guys!
We will post more developments in the next days! If you have any feedback or questions, please write them in the comments section below.
Thu Aug 9 '18 Announcement
over 7 years ago
– Thu, Aug 09, 2018 at 03:50:24 AM
Hey there guys,
We have some important announcement to make regarding the shipment of your Raise keyboards.
Unfortunately, it will be pushed back to a later date.
As you know, in the past few weeks we've been working on the Golden Prototype. In our previous update, Manel did a cool video explaining what's been going on.
But because of certain complexities, we are unable to validate and finalize all of the components of the Golden Prototype in time.
The creation of the Raise keyboard involves numerous factories and they are all interconnected. If one component is incorrect, we would need to modify it, do iterations, and this can delay the validation process of the other components.
Modifying the components doesn’t mean that they’ll be done in a day or in a week. It’s more of an iterative process where we are going to be fixing each part until this Golden Prototype is perfect. And when it's perfect, then we'll be ready to go to the next phase, which is manufacturing.
We have made an illustration of the key players involved in the creation of the Raise keyboard, and created a video explaining the processes behind it. We believe that the best way for you to understand what's going on is to be open and transparent.
As you can see, there's a high level of complexity with this process.
We know we are in control of the process, but we're not in control of the amount of iterations that's going to happen. We understand the steps that we need to go through, but we cannot absolutely control every variable and the execution of every variable. As a result, this is delaying our manufacturing process.
Truth be told, we would love to give you a definite deadline. But the best thing now, is to have the Golden Prototype approved. As soon as we have the Golden Prototype, we can prepare and share with you our next steps using a Gantt diagram where you will see the timeline of the entire manufacturing process: from creating the tooling, testing the pieces, to assembly. With this, we’ll be able to see how long the process will take and the day we’ll be able to ship your keyboards.
We hope this update has made things clearer for you as you have more context on what's going on.
We're working nonstop solving this, and all of these problems should be fixed in the following weeks. We are very sorry that we are late with the shipment.
Thank you so much for being patient and thank you for supporting us. Of course, we will totally understand that you're upset with this because it's an important reason to be upset with. But we will continue to work hard to deliver a high-quality product as we can imagine.
Sat Aug 4 '18 Announcement
over 7 years ago
– Sat, Aug 04, 2018 at 09:44:48 AM
We've been working closely with our manufacturers in China, creating the Golden Prototype. The video below is a compilation of the developments that have happened since day 1 until the first validation session.
The essential components
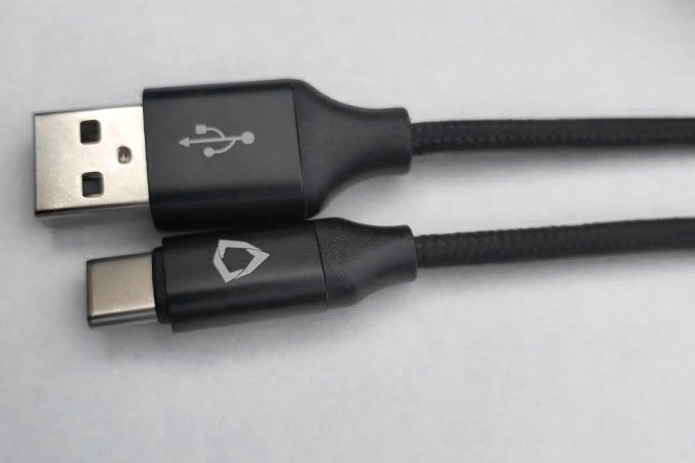
We've already finalised the design of the cables, this includes the right braiding and the right aluminium finishing for the connector.
Cable with logo
The only thing we need to decide now is whether or not there'll be a logo on the cable. We don’t want to have our logo in every component as we already have them in the keycaps, the palm pads, and also the Huble.
So for the Golden Prototype of the cable, we decided to put the logo only on one side. When we receive it, we will check, compare, and share it with all of you, and decide if it’s necessary to have a logo or not.
Another component is the palm pads. This is the only component which won’t have a Golden Prototype. This is because the palm pads require an expensive special metal tooling.
As you know, our palm pads have a unique shape which has all its fabric and PU curved in all sides. We want to validate and finalise the thickness, the fabric, and the anti-slipping material, before paying for this metal tooling.
So for the palm pads prototype, we have made it using a tooling the manufacturer already had.
Sample palm pad
It has a different shape from our palm pads but it has the same fabric, the same foam, the same anti-slipping material, and the same artwork as ours. We will receive this piece in a few days and test it. And once we’ve validated everything, we will pay for the metal tooling.
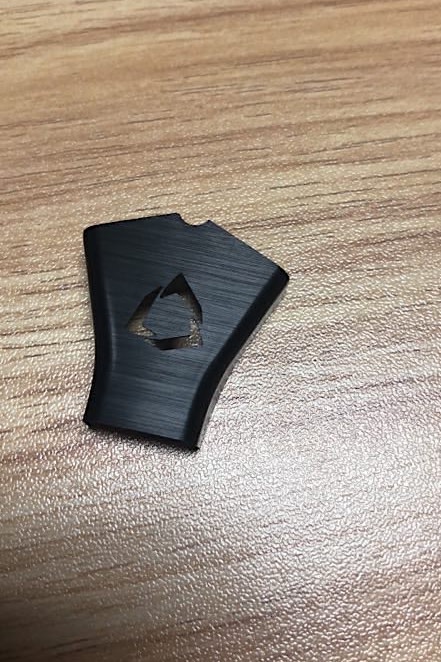
The third component that we’ve already created is the plastic partition cover (the joint piece) that is placed on the side where each half of the keyboards connect.
Joint pieces
Joint as partition cover
This piece is used as a cover to prevent the light escaping from inside. It will be 3D printed then painted.
We have also received photographs of the special keycaps.
As you know we have 8 special keycaps for the thumbkeys. They are not off-the-shelf keycaps so we need to make them ourselves. They will be 3D printed in translucent material, painted, then lasered to allow backlight.
Special keycaps 3D-printed
Everything’s going as planned
We’ve already received videos of the plastic translucent part of the Huble, which is made by CNC.
CNC process of one part of the Huble
This part will be painted in black PU color. The aluminium part is yet to be made.
We also have the top panel of the Raise. This part will be made in aluminium. It will be sandblasted, brushed, and anodized.
CNC pieces of the top panel
The manufacturers already made the CNC piece, but we still need to do the other processes.
Next we have the base of the Raise. We first did the left base. It has three different pieces: 2 translucent pieces & 1 big transparent piece.
Milling the left base
We have confirmed the left side. Our next step is to mill the right side.
For the keycap and switch puller, we are using an off-the-shelf piece but we are putting our logo and injecting it in 2 colours: dark grey and white.
Keycap-switch puller
As for the PCBs, we’ve already received the bare PCBs and have ordered all the components.
Bare PCBs
The next step is to do the PCBA, where all the components will be assembled onto the PCB. By then, we will flash our firmware onto the PCBs to check if everything works; most especially the lights, so we can test the base with the proper PCBs.
Huble might need a rework
We’ve received photos of the aluminium case of the Raise. It has already been sandblasted, brushed, and anodized.
Aluminium top case
The Huble’s aluminium part has also been made.
Huble aluminium top case
Its plastic translucent part has been painted in black PU.
Plastic translucent part painted in black
However there were a few minor problems that we found when fitting of the aluminium case to the plastic part. This problem is due to the adjustment of the stamping pieces.
The factory is reworking this.
Huble needs to be reworked
We have also tested fitting the base to the top aluminium case. Everything looks good!
Top panel attached to the base
Other components that have been made are the stainless steel metal pins for the joint. This is the first time we’ve received these pieces, so after some tests, we'll decide modifications.
Stainless steel metal pins
We also have news about the PCBs!
We received the PCBAs. These are the bare PCBs with all the components assembled. To be validate it, we would need to flash the firmware, check if it works and fits well together with the top panel and the base.
PCBA
We have also received photos of the first Mylar sample.
This is the PC sticker that is underneath the keyboard used to cover and protect the base.
Mylar sticker
Mylar underneath the base
The special keycaps have also been painted and laser-etched with the artwork.
First validation session: Good news & bad news
We had the first validation session of the Golden Prototype in our assembly factory in China. We had a video conference with our consultants and checked the fully assembled Golden Prototype.
There are some good news but also some bad news.
For the good news,the base, the top, the screws, and the mylar fit exactly how they should. The screws aren’t colliding with anything and the final block is solid.
The switches and the PCBs all fit properly.
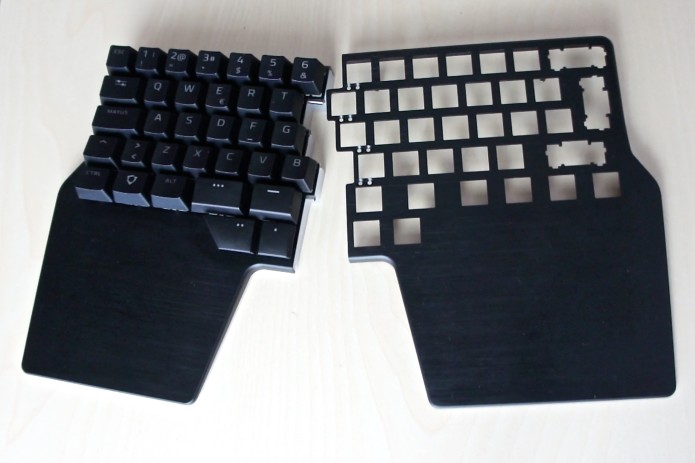
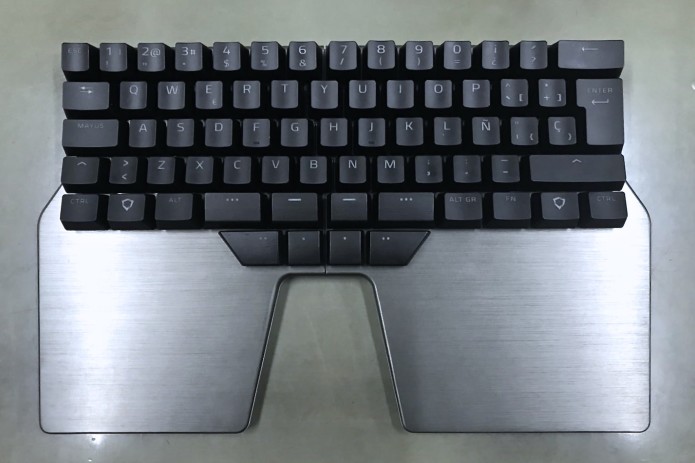
ISO layout - Spanish keycaps
More good news is that our custom keycap set looks great!
As for the bad news, our supplier made a mistake with the dimensions of the metal pins. Instead of creating it at 3.5 mm, they made it 4.0 mm. The difference is 0.5 mm. This is a huge problem because it doesn’t fit properly with the joint piece. Because of this, we can’t test the joint or the attachment of the keyboards.
Metal pins with the partition cover
The solution for this is to repeat and modify these pieces.
Another bad news is that when we flashed the firmware to the PCBs, it didn't work properly, especially the lights. And we needed the lights to validate the base.
We're disappointed with this because this isn’t an electronics problem but an execution problem.
We have 2 solutions. One is for the manufacturers to check the PCB again given all our drawings and specifications and find the problem and fix it. But they have also sent us a set of PCBs.
So the second solution is for Matt, our CTO, to take a look at it. If they can’t fix it, we will.
Given all these issues, we need to repeat the session.
We're going to do a session as soon as possible where they will have fixed all the problems. And then we will validate the Golden Prototype again.
We are disappointed as we would’ve wanted to have validated everything in this session but it hasn’t been possible. We can validate a lot of things but not all of them.
So we will fix all the problems and do another session as soon as we can.
It has been a busy last couple of weeks for us but we will update you asap on the next session.
Thank you all for your time reading this update! As always, your comments are welcome!


 Sample palm pad
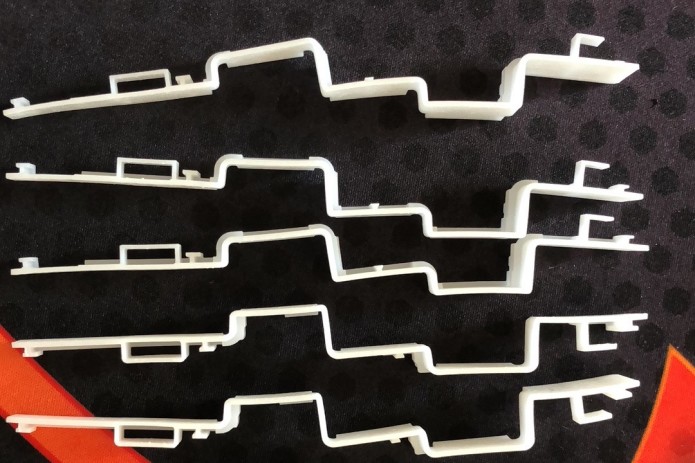 Joint pieces
 Joint as partition cover
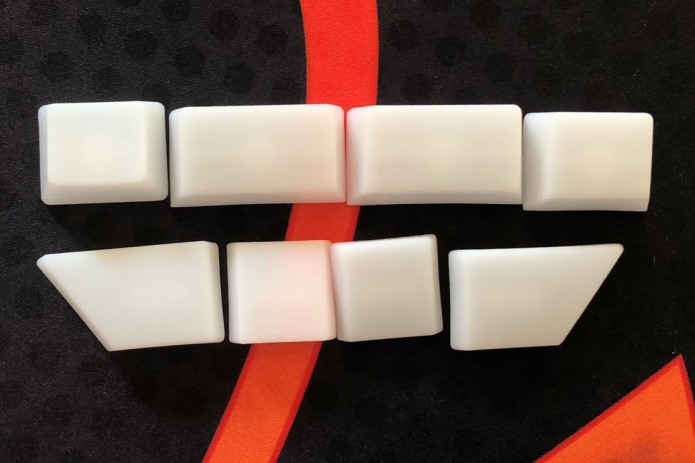 Special keycaps 3D-printed
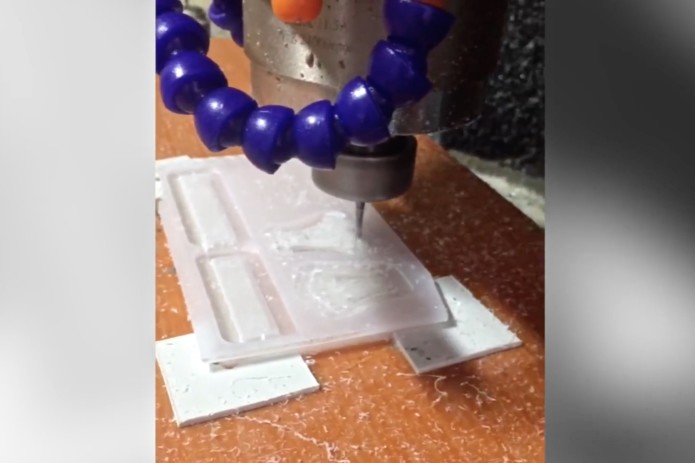 CNC process of one part of the Huble
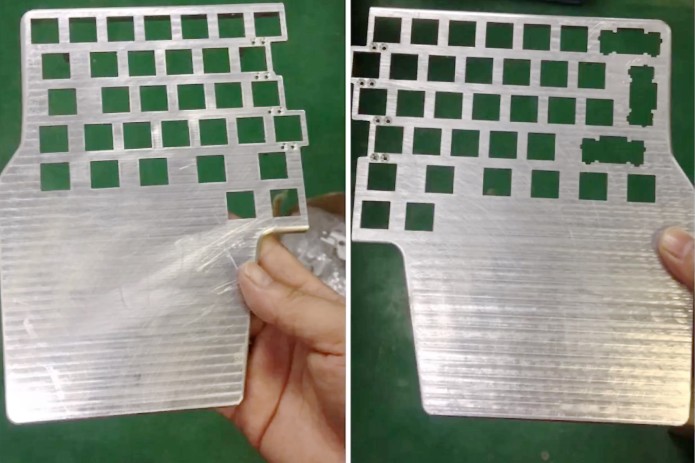 CNC pieces of the top panel
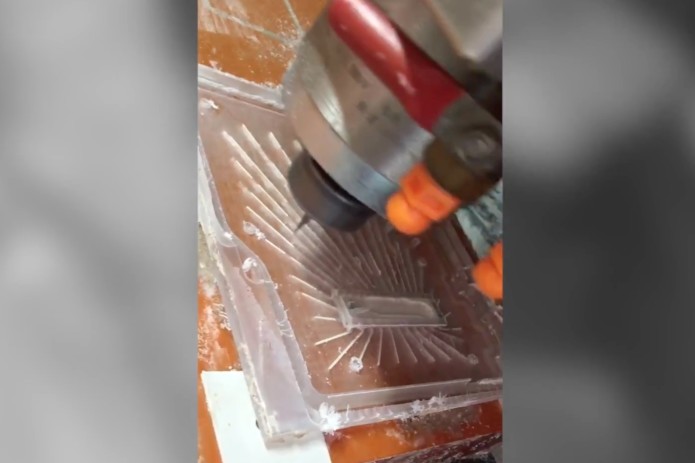 Milling the left base
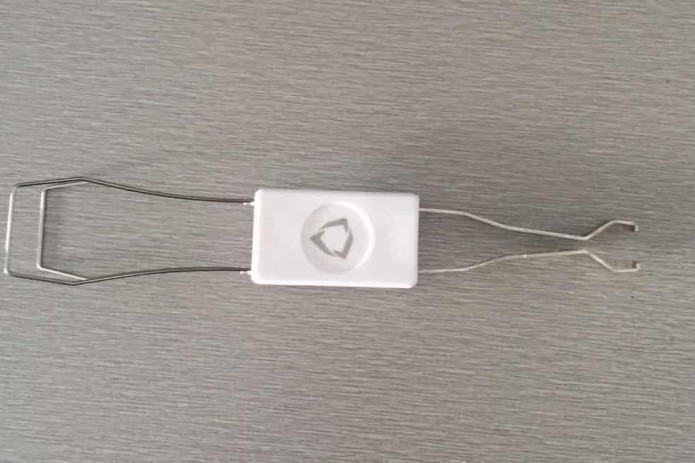 Keycap-switch puller
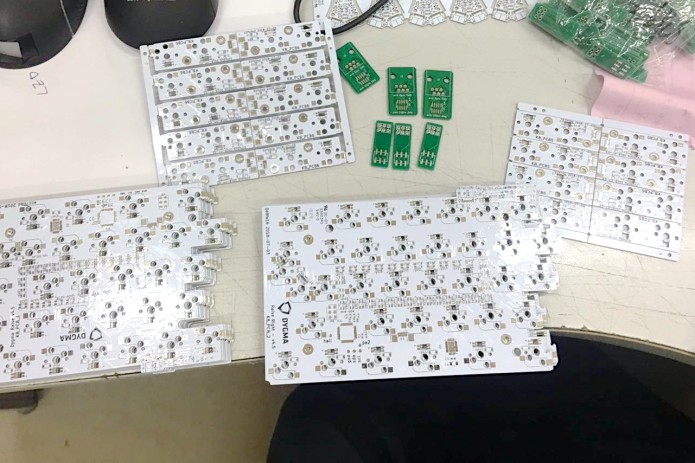 Bare PCBs
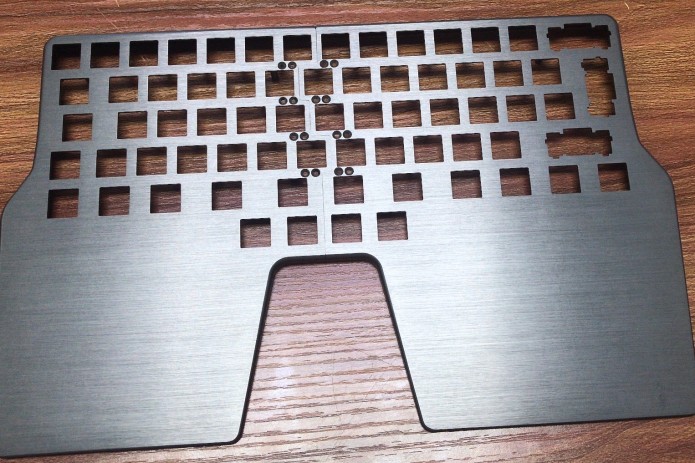 Aluminium top case
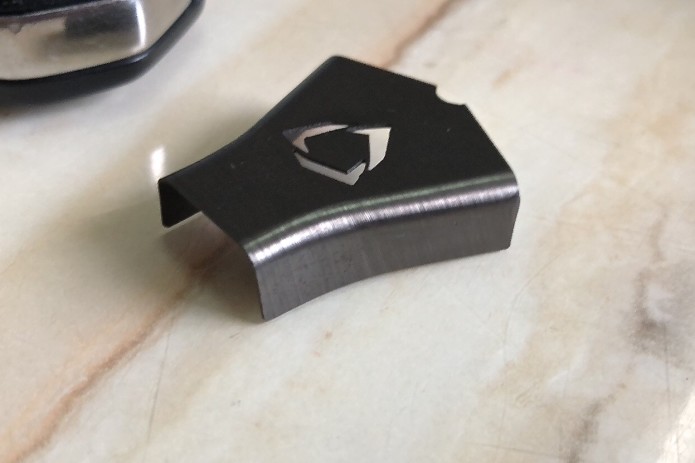 Huble aluminium top case
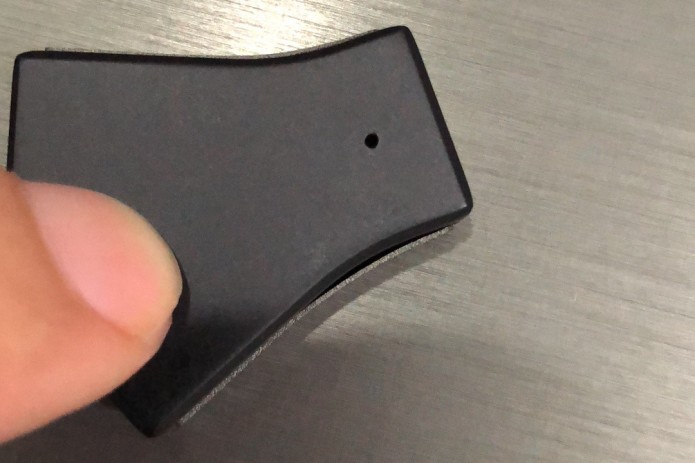 Plastic translucent part painted in black
 Huble needs to be reworked
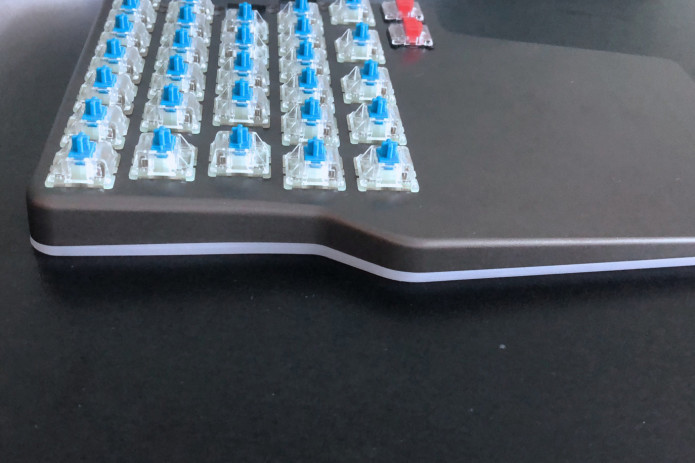 Top panel attached to the base
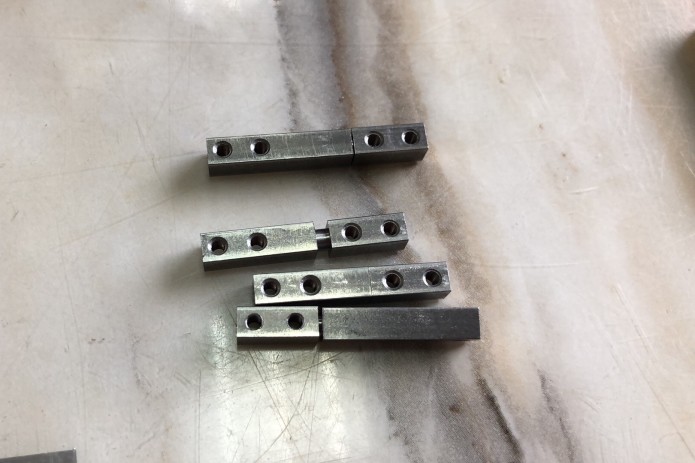 Stainless steel metal pins
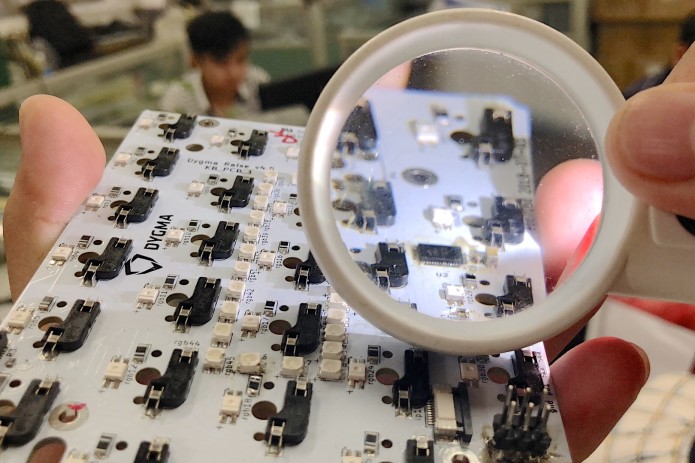 PCBA
PCBA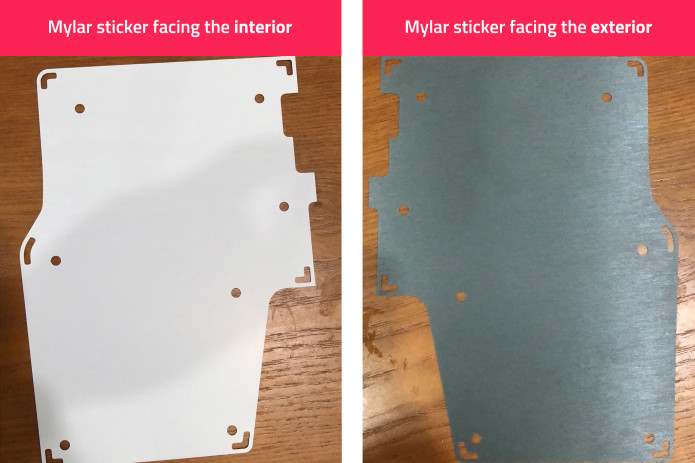 Mylar sticker
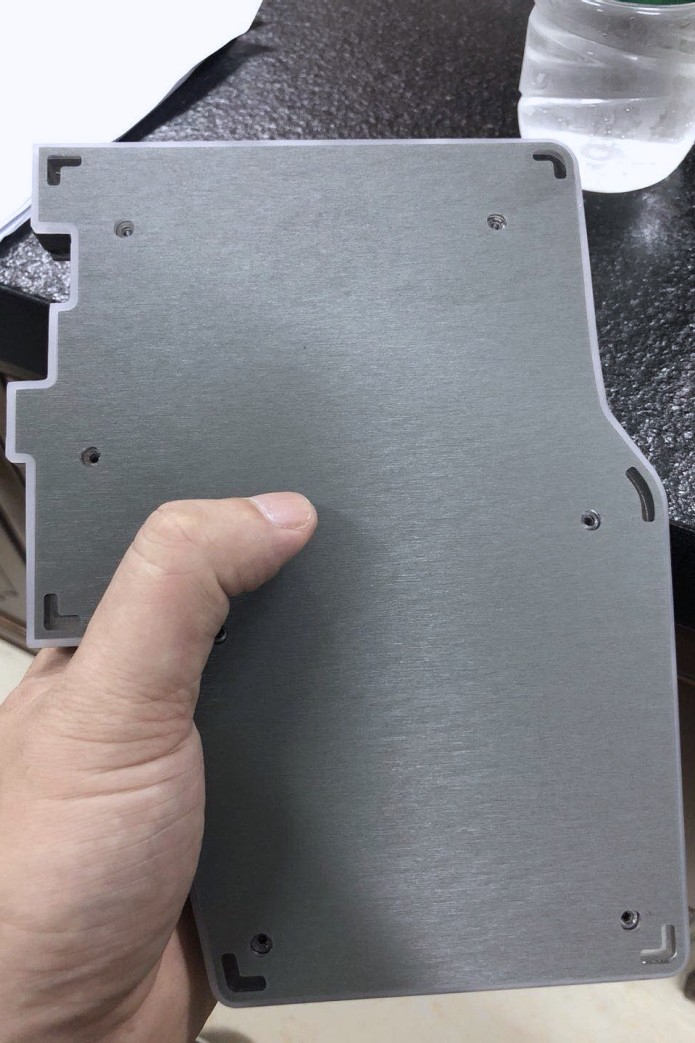 Mylar underneath the base
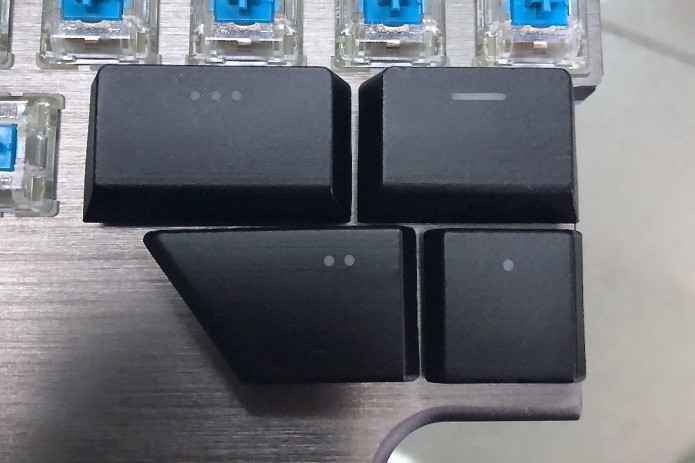
 ISO layout - Spanish keycaps
 Metal pins with the partition cover